I think we all have a favorite item of clothing. Mine is a brown shirt that I bought from my friend, Heidi, back in the days she sold Layers Clothing. That brown shirt was very flattering. Very forgiving. So flattering and forgiving, in fact, that I was able to wear it through all the cold months of my last pregnancy.
It was nice and stretchy. Wearing a shirt into the later months of pregnancy--especially a favorite shirt--has one big drawback. It might
stay stretched out.
So, what's a girl to do if her favorite {maternity} shirt is all stretched out? Well, if she had some success recycling some of her
daughter's clothes....
....she might start cutting up some of her own.
The steps I took to re-fashion Endeavor's shorts and shirts and my favorite/maternity shirt are very simple, and can be easily applied to most fashion recycling projects.
This is what you'll need for an easy re-fashioning project:
Gently used item of clothing
Sewing scissors (pinking shears are extremely helpful)
Sewing machine
Iron
coordinating fabric (small yardage--even scraps from other projects will do)
matching thread
measuring tape
After gathering your materials, you'll need to do a little planning:
Consider the piece of clothing you'll be refashioning. What is it about this piece of clothing that needs to be refashioned? Is it too long? Too short? Is there a hole in it? Stained? Stretched? Look at the item and think about how you can eliminate the problems during the refashion.
For instance, Endeavor's shirt had a stain on it, towards the hemline. So, I cut off the shirt above the hem, cut up to the neckline, and trimmed the edges with fabric so it became a cropped cardigan.
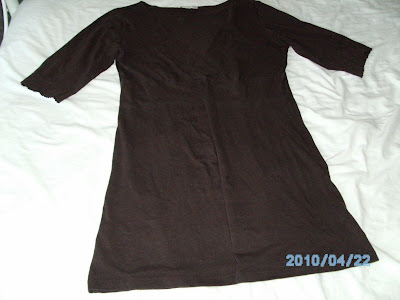
With my old shirt, the problem was that the lower half of the shirt had stretched, leaving lots of unflattering wrinkles and a loose hemline when I tried to wear it. The sleeves had also stretched over time. In this case, a long cardigan seemed like the best solution. Hence, the cutting, as pictured above.
Straight up from hemline to neckline, and then at the sleeves, just below the elbow.
Once you've planned what will work for your re-fashioned style,
take a look at your fabric scraps and find some coordinating pieces. You'll use these to trim the cut edges of your clothing item.
The next steps involve cutting and sewing.
For both of my projects, I did the same basic things.
I made my own trim by measuring the length and width of trim I wanted to have on my outfit. I added 1 inch to the length, and I doubled the width and added 1 inch. I used these measurements to cut out strips of fabric.
I folded over 1/2 inch of fabric on both sides of my strip, and ironed the folds in place.
I also folded in and ironed the ends.
Then, I folded this strip of fabric in half and ironed it.
This became the trim that I used for the neckline and front of my cardigan. I did
not cut my trim on the bias, so it isn't technically bias tape, although the concept is similar. I have washed this cardigan, and didn't have any issues after washing with this type of trim, so I can vouch for non-bias trim on projects like this.
I'm a novice seamstress, and I did find that with the knit material I was sewing my trim onto, there was a little stretching as a sewed. So, you may want to account for this by adding a little extra length to your trim.
Next, I laid out the part of the shirt I was trimming, with the cut edge lined up with the fold of the trim fabric.
I ran a strip of stitchwitchery tape down one side before I folded the fabric strip over it. Then I ironed it down. The no-sew tape helped hold the fabric in place--a little easier than pins when sewing a project like this.
I sewed the fabric strip onto my shirt.
I thought it looked better to have two seams running down this trim, so that's they way I did it. I used thread that complemented my fabric, but didn't blend in, so that the seams became one of the details of my piece--similar to the double, contrasting seams on jeans.
It was getting late at this point, and I started running out of steam. I don't have detailed pictures for making the sash. Basically, I decided on a length and width. I doubled the width and added 1 inch. Once I had the sash pieces cut out, I folded them in half, with the outside of the fabric inside the fold. I sewed a straight seam (1/2 inch) then ironed it flat, as pictured above. I didn't sew the ends, because I needed to turn the sash inside out of what it was, so that the seam was inside. Then I ironed it again, sewed the ends closed, and pinned it onto the shirt.
I stitched the sash onto the shirt with seams on both the upper and lower sides. I continued these seams down the length of the sash, even though I wasn't sewing the ends onto anything--just for aesthetic reasons.
Sorry, I was totally pooped out by the time I got to the sleeves, so I don't have pictures of how I made those. All I did was sew a ruffle onto a fabric band, and attach that to the raw edges of the sleeves.
And this is how it all turned out.
A fun spring cardigan to layer with other tops! This same design could be applied to an old dress to make a longer cardigan or a swimsuit cover-up.
I'll be linking this post to


Wow - Love what you have done with this piece. Gorgeous transformation. The fabric is super cute! Thanks so much for stopping by and joining the Sunday Showcase Party! I greatly appreciate it! Hope you have a wonderful week! Hope to see you again Sunday! ~ Stephanie Lynn
ReplyDeleteI have been very inspired to sew since blogging. I have not done it since HS!~ Your projects are simply adorable. Thanks for stopping by, we are planning a trip to Germany in two years, and I can't wait to get there!
ReplyDeleteSuper super cute! I love the fabric too!
ReplyDeleteFun! I love the tie around the waist.
ReplyDelete